Setting the NSTextView Line Height in a Beautiful Way
In the original post about a cheap way to set the line height in a text view to, say, 150%, the result kind of worked but didn’t look that cool. One issue is that the extra line spacing was exclusively added at the bottom.
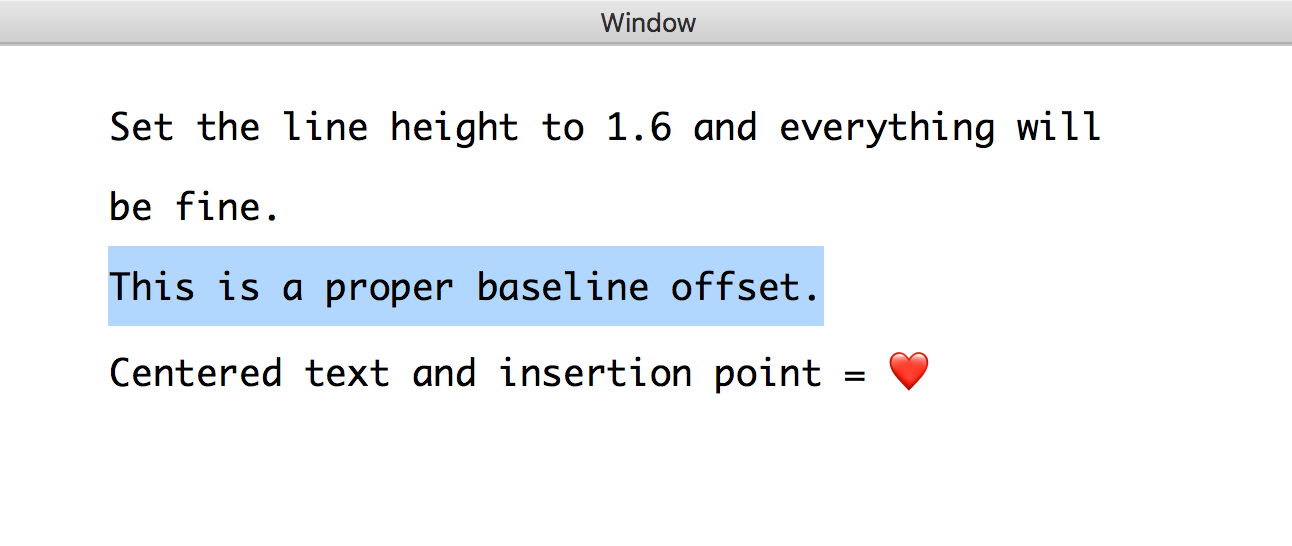
With the following solution, you’ll get a proper line height with tastefully aligned insertion point and baseline and all.

The TextKit/Cocoa Text thing we are going to change is the lineFragmentRect. TextKit is immensely powerful, but also complex and not easy to start out working with. To increase any given lineFragmentRect, implement NSLayoutManagerDelegate like this:
class ViewController: NSViewController, NSLayoutManagerDelegate {

    let lineHeightMultiple: CGFloat = 1.6
    let font: NSFont = NSFont.systemFont(ofSize: NSFont.systemFontDefaultSize())

    public func layoutManager(
        _ layoutManager: NSLayoutManager,
        shouldSetLineFragmentRect lineFragmentRect: UnsafeMutablePointer<NSRect>,
        lineFragmentUsedRect: UnsafeMutablePointer<NSRect>,
        baselineOffset: UnsafeMutablePointer<CGFloat>,
        in textContainer: NSTextContainer,
        forGlyphRange glyphRange: NSRange) -> Bool {

        let fontLineHeight = layoutManager.defaultLineHeight(for: font)
        let lineHeight = fontLineHeight * lineHeightMultiple
        let baselineNudge = (lineHeight - fontLineHeight)
            // The following factor is a result of experimentation:
            * 0.6

        var rect = lineFragmentRect.pointee
        rect.size.height = lineHeight

        var usedRect = lineFragmentUsedRect.pointee
        usedRect.size.height = max(lineHeight, usedRect.size.height) // keep emoji sizes

        lineFragmentRect.pointee = rect
        lineFragmentUsedRect.pointee = usedRect
        baselineOffset.pointee = baselineOffset.pointee + baselineNudge

        return true
    }
}
Note that this will increase the line height for all lines – except the last trailing newline or the height of the blinking insertion point in an empty document.
When you have an empty text or add a trailing newline character to your text, the insertion point is actually outside the very text container you know and love. NSLayoutManager has a extraLineFragmentRectContainer that takes care of the extraLineFragmentRect – which is used for the last (or only) empty line in a text. You need to increase that to a similar value.
If you have trouble wrapping your head around this concept, think about it this way: a newline character is not actually a glyph. It is not drawn. On top of that, a "\n" does belong to the line it is put on, but then you do not really have a line following after that until you type.
The following string:
The first line\nand the second,\nbut after this, there's no 4th.\n
… will be treated by text editors like:
The first line↩︎
and the second↩︎
but after this, there's no 4th↩︎
… where the last line break is a character of the 3rd line, but renders as:
The first line
and the second,
but after this, there's no 4th.
These 3 lines of text are supposed to illustrate that the trailing newline character is a character of the last line with text in it; if you are in a text editor and put the insertion point after the last \n-newline, you’ll be taken to a 4th line of text that doesn’t exist in the document. It’s merely a user experience thing.
So the layout manager cheats. When there’s a trailing newline character (or empty text), it appends the extraLineFragmentRect. In that rect, your insertion point blinks.
To change the height of the extraLineFragmentRect to suit a larger line height multiple setting, there are two places to intervene:
NSLayoutManager.setExtraLineFragmentRect(_:,usedRect:,textContainer:)itself can be changed to callsuperwith a different line height.- Subclassing
NSTypesetterand suggesting a larger rect in every occasion you would callNSLayoutManager.setExtraLineFragmentRect.
I have no clue about NSTypesetter, so the next best thing I can control (and thus suggest you do as well) is overriding setExtraLineFragmentRect.
class LayoutManager: NSLayoutManager {

    var lineHeightMultiple: CGFloat = 1.6

    private var font: NSFont {
        return self.firstTextView?.font ?? NSFont.systemFont(ofSize: NSFont.systemFontSize())
    }

    private var lineHeight: CGFloat {
        let fontLineHeight = self.defaultLineHeight(for: font)
        let lineHeight = fontLineHeight * lineHeightMultiple
        return lineHeight
    }

    // Takes care only of the last empty newline in the text backing
    // store, or totally empty text views.
    override func setExtraLineFragmentRect(
        _ fragmentRect: NSRect,
        usedRect: NSRect,
        textContainer container: NSTextContainer) {

        // This is only called when editing, and re-computing the
        // `lineHeight` isn't that expensive, so I do no caching.
        let lineHeight = self.lineHeight
        var fragmentRect = fragmentRect
        fragmentRect.size.height = lineHeight
        var usedRect = usedRect
        usedRect.size.height = lineHeight

        super.setExtraLineFragmentRect(fragmentRect,
            usedRect: usedRect,
            textContainer: container)
    }
}
So you end up with a NSLayoutManagerDelegate and a NSLayoutManager and essentially put similar calculations in two different places. You could argue that since we’re working with a NSLayoutManager subclass now anyway, we could override setLineFragmentRect (note the missing “Extra”), too, and have both settings in one place.
I like to keep the dedicated delegate methods alive as long as I can, though, and find the baseline offset setting very convenient for our purposes.
And that’s about it!
If you never dipped your toe into the intricacies of TextKit, I guess you fell like I did: not happy about the many things you have to know for such a simple effect. “If I have to perform this kind of calculation and conform to that kind of complicated delegate methods to increase the line height,” you might ask, “what will I have to go through to implement really fancy features?” – And I really sympathize with that irritation. There’s so many intricacies to know! After 2 weeks of fighting with TextKit, I now have a better overview but still fail to guess which component does what; we’ll see how deep I have to dive and what I’ll find out in the upcoming weeks and months.